Installation and use instructions nimbus® R

Thanks to a linear process and guided, installing nimbus® R becomes a simple task.

1. Unboxing

Verify the following information before starting the installation
Floor level assembly
Wear gloves

IEC-60903 and EN-60493

Hadle with care
Tools needed

Allen key M4 (included)
Allen key M6 (not included)
Wrench (not included)

Do NOT open PV-Box

2. Assembly

nimbus® R

Warning

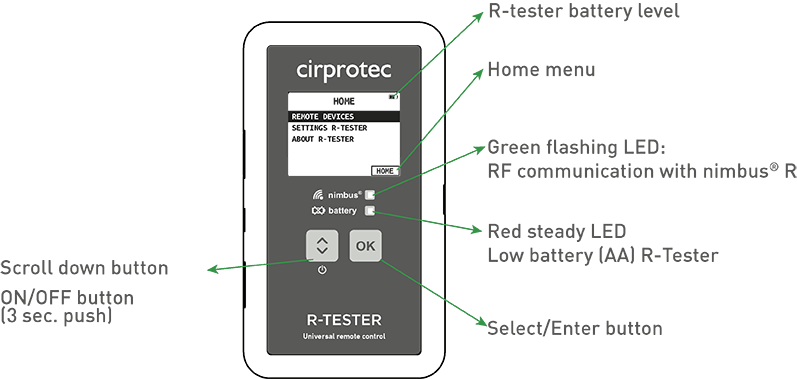
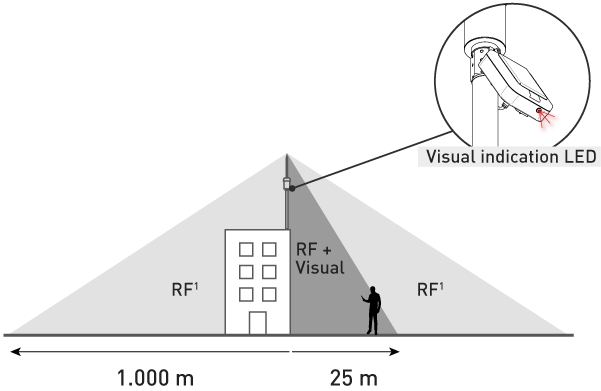
Once connected, avoid direct contact with the lightning rod while you wait for execution of a remote test requested from an R-Tester (this could take some minutes and will be indicated on nimbus® R by a flashing LED at the bottom edge of PV-box).

R-Tester

T. Remote test

Connectivity and verification

Test before installation at height to make sure the lightning rod was correctly connected to the PV module.

Remote test results:

Streamer electronics are ok

Oops! Connection was lost, retry

Streamer electronics reached end-of-life, replace air terminal

3. Installation

Test before installation at height to make sure the lightning rod was correctly connected to the PV module. Keep the following considerations in mind for the best possible installation.

1. Orient the PV module acc. to your location

2. If needed, adjust to best orient PV towards S or N (+/-60º)

3. Distance range for remote test from R-TESTER

RF: Radiofrequency range

Best avoid situations with more than 2 or 3 walls/floors between R-Tester and nimbus® R for NLOS (no line-of-sight) situations.

T. Remote test

Checking the electronics components by test your nimbus® R

Checking battery level of PV-box.